Focus mitt training is one of the best ways to develop punching technique, defense, fight strategies, and sport-specific conditioning. But it’s not just for boxers; fast-paced and fun, “hitting mitts” is also a great workout for regular gym-goers looking for something more stimulating than a treadmill.
Unfortunately, focus mitt work has a steep learning curve that can be discouraging. Like shadowboxing, pad work is a blank canvas, and its value is proportional to your current boxing knowledge (or your trainer’s), but it’s even trickier because it requires two competent people. Without proper instruction and a good partner, first-timers can expect sore elbows, stuffed punches, and not a single satisfying THWACK! Maybe that’s why pad work never showed up in a single Rocky montage.
Today, you’ll learn how to get the most out of your focus mitt training. This article covers beginner questions, pad holder best practices, and shares 12+ focus mitt drills with beginner, intermediate, and advanced options.
What is Focus Mitt Training and How Can It Help Me?
Feel free to skip to the next section if you’ve used boxing mitts before.
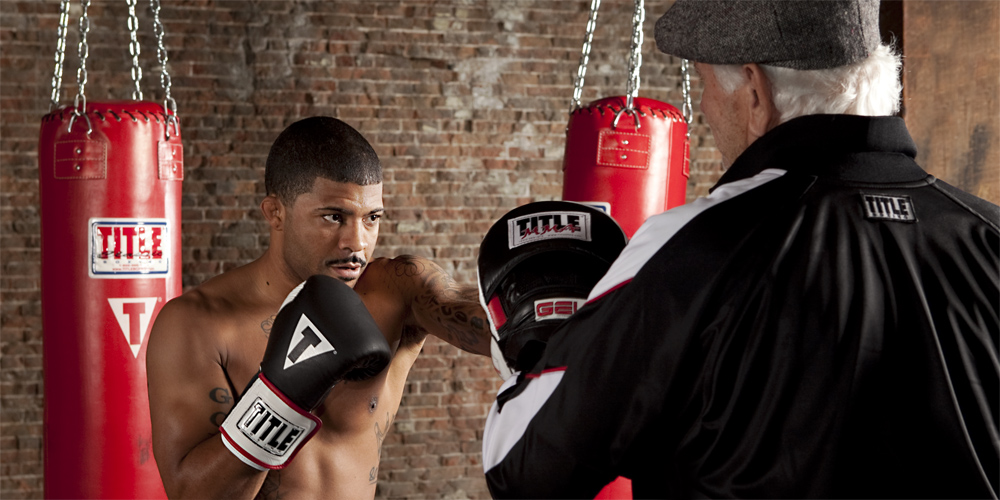
Focus mitts are flat, hand-held pads that boxing coaches and fitness trainers use to “catch” punches from their trainees.
Focus mitt training can help:
- Refine your offensive and defensive boxing skills
- Sharpen footwork by forcing you to evade, pursue, and cut angles on a live “opponent”
- Burn thousands of calories to shed fat
- Build muscular endurance throughout the entire body
- Improve aerobic and anaerobic conditioning
- Enhance reaction time
- Develop better intramuscular coordination, timing, and reflexes
Focus mitt training is preferred by boxers because it’s so realistic. It allows boxers to simultaneously work their offense and defense against a dynamic moving target, and lets trainers recreate styles and scenarios to prepare their fighters for specific opponents. It’s as close as you can get to the sparring experience without putting yourself in harm’s way.
The duration, intensity, and structure of focus mitt training depends on your unique goals, though most people follow boxing’s work-to-rest ratio of 3-minutes on, 1-minute off, for 3 to 12 rounds. Beginners can start with shorter rounds and longer recovery periods, then build to 3, 4, or even 5-minute rounds with limited rest. Alternately, you can count punches, work with ladders or pyramids, apply density training concepts, or even incorporate focus mitts into a circuit – the options are endless.
Though your focus mitt training is really only limited by your imagination, pad work generally falls into four different categories:
Call and Catch – The trainer asks or “calls” for specific punches and combinations. This all-purpose style is ideal for teaching new combinations, correcting technique, and developing strategy.
Flash Pads – The trainer presents targets as non-verbal cues for their trainee, with the angle and position of the focus mitt indicating which punch is being called for. This style is ideal for reaction training and developing what Duane Ludwig calls “the counter eye” – that is, the ability to read openings in live situations.
Drilling Combinations – The trainer drills a single combination for the duration of the round. Some coaches start the round with the full combo, while others allow it to build punch-by-punch. This style is less mentally demanding than the call-and-catch or flash pad approach, but allows the trainer to isolate punches to trim the fat off of technique and develop power.
Burn-outs – The trainer calls for non-stop straight punches, hooks, uppercuts, or a mix of all three for a predetermined interval. Also known as “punch-outs,” burn outs are ideal for hand speed training, anaerobic conditioning, and building muscular endurance.
Want a better sense of what focus mitt training is all about? Watch boxing superstar Miguel Cotto work the mitts with legendary trainer Freddie Roach at Wild Card gym, and notice how he incorporates all four styles of focus mitt training into this session:
Pad Holder Tips for Better Focus Mitt Work
Avoid the worst beginner focus mitt mistakes with these five tips:
1. Meet the Punch
To catch a punch properly, you must meet it with the focus mitt at the point of impact. This gives the boxer a solid and satisfying hit, rather than having them punch through a limp wrist and overextend their arm.
The mitt should travel 2-6 inches before it makes contact with the punch. It is imperative that you meet every punch that your trainee throws during a focus mitt session to prevent injury. This is the number-one tip for better focus mitt work. In fact, this one piece of advice will put you light-years ahead of the average pad-holding newbie.
2. Provide Targets at the Proper Height for Your Partner
When you’re holding pads for someone, make sure they’re punching at eye level for head strikes and belly, chest, or rib-level for body shots. Ideally you want to find a partner of similar height, but shorter people can easily hold for taller fighters if they’re diligent about lifting the pad higher. When in doubt, higher pad placement is almost always better.
3. Maintain a Realistic Fight Rhythm
Beginners sometimes approach the mitts with a “light-switch mentality.” During a round, they’re either on or off; alternately hitting the pads as hard as they can, or losing focus and drifting out of fighting stance while they wait for the next command. Quality pad work flows like a real fight, which is perpetual motion split into sequences of explosive punching, smooth footwork, sharp head movement, and measured defense. Watch Bernard Hopkins work seamless offense and defense into a realistic fight rhythm. Notice Hopkins’ calm focus, and how he focuses on technique rather than killing the pads:
https://warriorpunch.com/wp-content/uploads/2017/01/defense-distance.mp4
Be sure to approach your focus mitt work with this realistic fight rhythm in mind.
4. Be a Good Example for Your Fighter – Show Them What You Want to See
Like partnered shadowboxing, holding the mitts is an excellent opportunity to show your fighter how you want them to stand, move, feint, and think. Embrace our “monkey see, monkey do” hardwiring and use proper fighting stance and mechanics at all times. Over time, your fighter will mirror your good habits and make them their own. Just because you could hold mitts while wheeling around in an office chair doesn’t mean you should!
5. Less Talking, More Socking
The best pad holders say as little as possible to their trainees when the round timer is running. Hitting the mitts at a high level requires laser focus, and any unnecessary chatter will only be a distraction. But don’t I have to correct their technique?
You do, but like the old writing adage says, it’s always better to “show and not tell.” Rather than bringing the workout to a screeching halt to explain every technical sin they commit, show them the problem to the best of your ability.
Right hand dropping when they jab? Throw a slapping “lead hook” with the focus mitt to remind them of the opening they’ve left. Balance out of whack when they move towards you? Give them a little shove and show them what happens when they forget their feet. It might sound “barbaric,” but this kind of live, interactive feedback is exactly what boxers look for in quality mitt work.
Sport-Specific Focus Mitt Drills for Skill Development
These drills are helpful for novice, intermediate, and advanced boxers.
Each drill outlines the role of boxer and trainer, though your “trainer” could be anyone – your gym mate, your sparring partner, or your girlfriend – so long as they’ve read through our pad holder tips.
Suggested combinations are listed by punch, not target – as you and your pad holder advance, you can start to target the body at your discretion.
Reaction Punching Drills (or “Classical Conditioning”)
Classical conditioning is defined as “a process in which a previously neutral stimulus comes to evoke a specific response by being repeatedly paired with another stimulus that evokes the response.”
Okay, how is this relevant?
Every time you throw a punch, you create an opening for your opponent. Reaction punch drills are designed to take advantage of these openings, conditioning fighters so that the “previously neutral stimulus” (aka the punch banging off your glove or elbow) evokes the desired response (aka slamming an uppercut into their exposed jaw).
Jeff Mayweather runs a master-class in classical conditioning here:
https://warriorpunch.com/wp-content/uploads/2017/01/elbow-counters.mp4
These are a few excellent reaction punch options for beginner:
- Trainer throws rear hook to the body. Boxer catches punch on elbows. 5-6-3 or 3-2-3.
- Trainer throws lead hook to the body. Boxer catches punch on elbows. 6-3-2.
- Trainer throws rear cross to the head. Boxer catches punch on left glove or forearm. 2-3-2.
- Trainer throws lead hook to the head. Boxer catches punch on right glove or forearm. 3-2-3.
Mayweather runs through some advanced variations involving blocks and parries here:
https://warriorpunch.com/wp-content/uploads/2017/01/catch-and-counter.mp4
Inside Fighting Drills
Shawn Porter is one of the most successful modern inside fighters because he combines wrestling, shoulder bumps, and swarming angles to keep his opponents guessing:
https://warriorpunch.com/wp-content/uploads/2017/01/porter-inside.mp4
We can train these same skills using 3 classic drill:
Option 1 – Wrestling
Boxing on the inside involves equal parts cleverness and physicality. Alternate intervals of combination punching or burn-outs with “wrestling.” Mix up your wrestling tactics. Widen your stance and use underhooks, overhooks, and pressure from your elbow, forearm, head, and shoulders to bully your way into good positions. Use your hands to push and turn your opponent. When squared up, focus on keeping your arms inside of your trainer’s for greater control and offensive options. Occasionally “bulldoze” your trainer, dropping below eye level and using your whole body to lift and off-balance them. When the punching interval starts, focus on powerful short-range punches to the head and body – 5-6-3, 2-5-3, 4-5, 6-3, 3-6-5. Immediately clinch up and start to work as the wrestling interval starts. Repeat until time’s up. This drill is tough for trainer and trainee alike. Don’t be surprised when your arms and breathing get heavy after one round!
Option 2 – Shoulder Bump Drill
On the inside, you usually won’t have space to punch unless you make it yourself. The shoulder bump is an excellent tool in that regard. Starting low with your lead shoulder in contact with the opponent’s body, it uses drive generated by the legs, hips, torso, and shoulder to bump the opponent back, throwing them off balance and creating room to punch with your now-loaded rear hand. Think of the shoulder bump mechanics like an exaggerated power jab driven hard from the hip, only the arm isn’t involved. As you thrust the lead side of your body forward, the force carries into your opponent, who either needs to push back at that moment or give ground. This can be practiced on the heavy-bag, but you won’t get the same feel for the starting position as you will with your trainer. The “power” of your shoulder bump will depend on what you’re trying to accomplish in that moment; in this way, this drill can be subdivided into at least three others. Smaller bumps are meant for short-range offense for situations where you intend to stay inside the pocket – 6, 6-3, 4, 4-5. Once the trainer catches the combination, move back to the “start position.” Bigger bumps can also be used for medium and long-range offense – 2-3, 2-5, 2-1, 2-3-2-3, 2-5-2-3 – and they can also be used to disengage.
Option 3 – Angles Drill
Starting squared up on the inside, the boxer will set up offense by stepping and pivoting to either the outside or inside angle. No punches will be called for until the angle has been created, and the trainer has turned to adjust. The trainer may call for specific angle changes, or let the boxer choose. If the boxer takes an outside angle, the trainer will prompt for combinations that lead with the rear hand: 2-1-1, 2-5-3, 2-3-2-5. If the boxer takes an inside angle, emphasize short-range combinations that start with the lead hand: 3-6-3, 5-3-2, 3-2, 3-6. This drill reinforces the value of creating angles, illustrating the time it takes the trainer to adjust, as well as the openings that emerge as they do. The angles drill also helps fighters understand how much (or more often, how little) they need to step.
Hundreds of articles could be written on the art and science of inside fighting, so don’t think this is all there is to it; nonetheless, these are excellent drills for developing the set-ups, physicality, and movement required for a strong short-range game.
Outside Fighting Drills
As with inside fighting, there’s much more to long-range boxing than this, but these drills will help develop the parries, head movement, and counter punching you need to do damage on the outside.
Option 1 – the “Fencing” Drill
Success at long range depends heavily on the jab, and your ability to defend it. This drill focuses on countering the jab with a parry and a jab of your own, which starts to look a little bit like a fencing match. The trainer will throw “jabs” with the focus mitt, which the boxer will parry. As the jab is parried, the boxer will fire back immediately with a jab of their own. Russ Anber and a young David Lemieux demonstrate this drill here:
https://warriorpunch.com/wp-content/uploads/2017/01/out-anber.mp4
Freddie Roach and Manny Pacquiao work a similar variation that mixes in the cross from southpaw stance off a parry:

Be sure to target the boxer’s head to ensure the motion is being properly executed; beginners tend to “jab” towards the parrying hand, helping their partner cheat the drill. As you advance, you can build on the jab, following your parry with long-range combinations – 1, 2, 1-2, 2-1, 1-1-2, 1-2-1, 1-2-3, 1-2-1-2.
Option 2 – Slip and Counter
It’s an old saying in boxing that the “bag doesn’t punch back,” and that’s one reason why focus mitt training is better for developing your ability to slip punches. This drill focuses on slipping medium and long-range punches, then countering appropriately. The trainer will throw jabs with the lead hand focus mitt. When slipping outside of the jab, the boxer will return with medium to long-range punches leading with the rear hand – 2-3, 2-3-2, 2-5, 2-1-1. When slipping inside the jab, the boxer will return with medium to short-range punches leading with the lead hand – 3-2, 5-2, 5-2-3, 5-6-3, 3-2-3, 3-2-5. We can see Anber working the outside slip-2-3 here:
https://warriorpunch.com/wp-content/uploads/2017/01/slip-counter.mp4
…and the inside slip-3-2-3 here:
https://warriorpunch.com/wp-content/uploads/2017/01/in-anber.mp4
Again, ensure that the trainer is shooting the focus mitt directly at the head’s starting position prior to the slip. Do not punch to either side of their head to minimize errors – they can learn now, or pay the price on fight night!
Ring Generalship Drill
This drill challenges the boxer to control the ring by reacting either offensively or defensively to the trainer’s movement. You can run a limited version of this drill on a heavy bag with a generous swing, but you lose a lot (a bag won’t foot-feint you, for starters).
Option 1 – Cutting Off the Ring
Take the center of the ring or training space. From here, you will try to cut your trainer off as they use lateral movement, fades, pivots, and side steps to run away. Step laterally in the direction your trainer is circling to cut them off. Once you close the gap and corner them on the ropes, fire short, high-power combinations as prompted – 2-3-2, 2-5-2, 3-6-3, 5-6-3 – then restart the drill in the center of the ring.
Option 2 – Using the Ring
Reverse the roles played in option 1, outmaneuvering your trainer as they work to cut you off. Rather than moving laterally into the ropes, circling around and out to your left or right to leave yourself as much space as possible at all times. Use feints and probing punches to discourage reckless aggression, and deke left and right so your trainer can’t predict your movement. As the trainer steps into range, fire long-range combinations as prompted: 1, 1-1, 1-3, 1-1-2, 1-2-1-1, 1-2-5, 1-2-3, 3-2.
The best boxing mitt drills for beginners often involve punching without making it a priority!
Wrapping Up
In the right hands, focus mitts are the best non-sparring learning and conditioning tools that the boxing world has to offer. Refer back to these tips and drills to make sure you’re getting the most out of this limitless training modality.
Please leave any questions or comments about these drills below or follow us on Facebook.